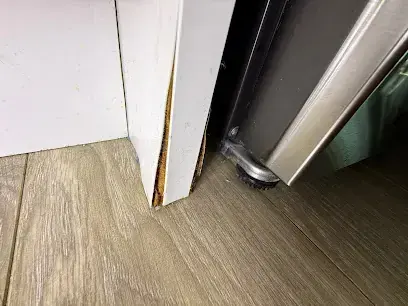
Brentwood is mostly large single family houses on big lots, built in subdivisions from the 1980s to the 2000s with newer construction mixed in. Big homes mean long supply runs to the washer, the ice maker and every toilet. A small failure on the second floor can soak the ceiling and walls on the first.
Key takeaways
- Long supply runs in large homes give a leak more places to start and more floor to travel.
- Washer hoses, ice maker tubing, dishwasher feeds and toilet supplies are the usual sources.
- Water from an upstairs fixture can reach the ceiling, light fixtures and walls below.
- The first moves are to close the shut off valve, stop the water and photograph the area.
- A moisture check behind and below the leak finds water that the surface hides.
Why big Brentwood homes have more places to leak
About 90 percent of Brentwood is zoned residential, and many houses are large single family homes on big lots. A big house usually has more plumbing, with longer runs from the main to the farthest fixture.
Supply hoses, tubing and compression fittings wear out slowly. In a big house there are simply more of them, and a failure may be far from the main shut off.
Older subdivisions have had decades of use on appliance connections, while newer homes tend to have more fixtures per house.
The usual sources of a supply leak
Most supply leaks start at a connection, not in the middle of a pipe. A hose swells, a fitting loosens or tubing cracks, and a drip becomes a spray.
- Washer supply hoses, especially behind an upstairs laundry room machine.
- Ice maker tubing behind a refrigerator, where leaks can run for weeks.
- Dishwasher feeds under the kitchen sink or behind a toe kick.
- Toilet supply connections at the wall and under the tank.
- Sink faucet connectors in bathrooms and powder rooms.
Slow leaks versus sudden failures
A slow leak keeps a floor or cabinet damp for weeks. A sudden failure, such as a hose that bursts, can put gallons on a floor in a short time.
Both need the same first step: closing the supply valve for that fixture.
How water reaches the floor below
Water finds the lowest path. On an upper floor, that is through the subfloor and into the ceiling cavity of the room below.
A laundry room over a kitchen or family room is a classic setup. Water seeps through the floor and appears as a stain, a sag or drips from a light fixture.
A ceiling leak water damage repair starts with finding the source and checking how far the water has spread inside the cavity.
- A brown or yellow stain that grows.
- A sag in the ceiling drywall.
- Drips from a light fixture or vent.
- Bubbling paint or loose tape on a ceiling seam.
- A musty smell in a room below an upstairs bath or laundry.
A shut off and moisture check routine
A short routine at the first sign of a leak limits what the water can reach.
- Close the shut off valve at the fixture, or the main valve if the fixture has none.
- Turn off the appliance and unplug it if it is safe to reach.
- Do not use the ceiling light or fan if water is dripping from it.
- Move furniture and rugs out of the wet area.
- Photograph the leak, the stain and the floor.
- Press on drywall and baseboards for soft spots.
When a meter is needed
Surface checks miss water inside walls and floors. A moisture meter reads wood and drywall and finds water behind a surface that looks dry. The reading on the lower floor is as important as the upper one.
What the cleanup does on two floors
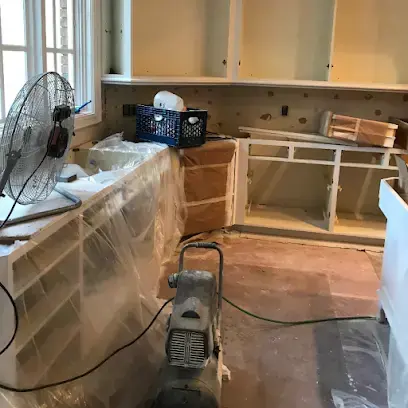
A leak that reaches two floors needs work on both. The crew starts where the water is standing and works down through each level.
Water extraction clears standing water from floors and carpet. Wet insulation and sagging ceiling drywall are removed, since they do not dry well in place.
Structural drying then places dehumidifiers and air movers on each floor, with daily readings.
- Upstairs: floor and subfloor around the leak dried.
- Downstairs: ceiling opened where it sagged or stained.
- Wall cavities vented at the baseboards.
- Cabinets and toe kicks checked for hidden water.
- Daily readings until the framing is dry.
Hidden leaks behind walls and appliances
Not every leak shows itself. A leak behind a refrigerator, under a dishwasher or inside a wall near a toilet can run for weeks.
Signs that something is wet out of sight include a floor that feels soft, a baseboard that lifts, a cabinet door that swells and a smell that comes and goes.
A supply hose and appliance leak cleanup starts with finding every wet spot, not only the one that showed first.
- Soft or spongy flooring near an appliance.
- Baseboards that lift or cup.
- Cabinet bases that swell or darken.
- A water bill that rises with no change in use.
- Warped hardwood near a kitchen or laundry room.
Cutting the risk of the next failure
A few habits cut the chance of another surprise.
- Replace rubber washer hoses with braided hoses and check them each year.
- Look behind the refrigerator when the ice maker is serviced.
- Know where every shut off valve is, and test that it turns.
- Close the washer valves when leaving for a trip.
- Replace any hose that looks swollen, cracked or rusty at the fittings.
Insurance and records
Photos taken at the start, a written list of what was wet and the drying logs give the insurer a record. Hold on to the failed hose or fitting if possible, because it shows how the failure happened.